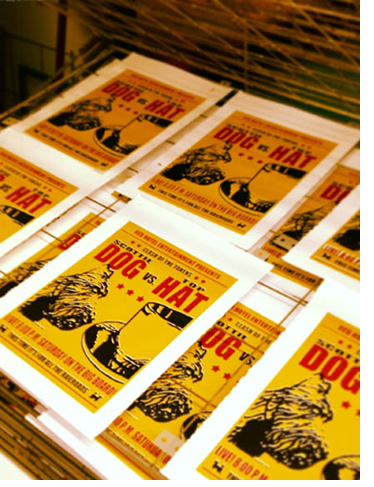
Ever wonder how a multi-color T-shirt gets made? The old-fashioned ones I mean, not the kind where a photo is inkjet printed right onto the shirt at Walmart. I’m talking about the silk-screen printing process, each color separately printed onto the shirt , one on top of the other.
I was mystified by this process. Couldn’t really wrap my head around it till I started doing it for myself, making T-shirts in Chicago back in the ’90s. The process is basically the same for the silk-screen art prints I’ve been making the past couple of years. Different inks, and paper instead of Hanes 100% cotton Beefy T’s, but pretty much the same.
Silk-Screen Printing Part One: Screens
A screen is what you use to print your colors, one color per screen. Essentially, you’re creating a type of stencil that allows you to print a uniform shape, color field, word, etc. Think of what a street artist does with cutout cardboard and spray cans. It’s kind of akin to how Banksy and those guys do it.
The screens used in silk-screen printing are similar to the kind in your windows that keep mosquitoes out, but instead of crisscrosses of metal wire, the screen is made of fine polyester mesh, almost like cloth. (Silk was originally used, but the newer polyester is stronger. Only the name remains.) Ink is placed on top of that screen, the screen is then placed cleanside-down on the shirt or paper, then, with a squeegee, the ink is manually or mechanically pressed through the fine cloth, creating a thin layer of color on the shirt or paper. But I’m getting ahead of myself. The first question is: how do you control where the ink goes through, creating the proper shapes of color you want to print?
First, using a small trough, you coat the entire screen with a thin layer of gunk called emulsion. When it dries — and it must dry in a dark room — emulsion becomes solid. No ink is able to go through dry emulsion. But, the emulsion you use in making a screen is light sensitive. It gets really, really hard when it’s exposed to light. And this is the trick you use to get your screen to only allow ink through certain parts: you expose the emulsion-coated screen to light (sunlight or a bright lamp), while covering the parts you want ink to go through. Those parts will remain unexposed to light, thus not hardening intensely, while the rest of the emulsion is exposed to light and does harden intensely.
Generally, you’d do this by printing or cutting out an image or the shape of what you want to print, usually onto a clear piece of plastic, called acetate. You then tape that acetate onto your emulsion-coated screen. Then you expose the screen to light. Where the light directly hits the emulsion, it will harden. Where the light doesn’t hit (because the black on the acetate blocks it) will not harden.
So now you have an emulsion-covered screen, dry, and exposed to light (except for the parts you’re going to want to print). How will the ink get through those parts?
Well, your screen is partially covered with very hard emulsion, and partially with merely dry, unexposed-to-light, softer emulsion. You want to get rid of the emulsion that was not exposed to light, but keep what was. This uncovers only the part of the screen that you want your ink to pass though, while the rest (where the hardened, light-exposed emulsion remains) will be impervious.
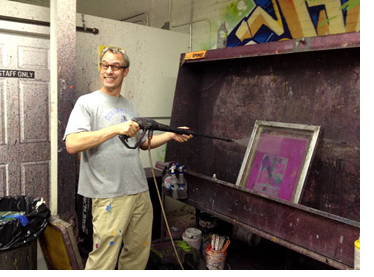
You get rid of the softer emulsion — are you sitting down? — with a high-powered hose in a big washout sink! Yes, you blast water at that sucker using a hose not unlike the kind used to power wash a house or a wooden deck. A hose that delivers a sharp, sustained blast in a thin, well-defined “wedge” of water. You put your screen in the sink, and thoroughly rinse all that soft emulsion right out, leaving only the hard emulsion that was exposed to light. After it’s dry, you have a screen ready to go, ready to let ink pass through only certain places.
Now you have a screen ready to print a color. If you’re doing a one-color print, you’re ready to roll. If you’re doing more colors, you need more screens, one for each color.
Silk-Screen Printing Part Two: Printing
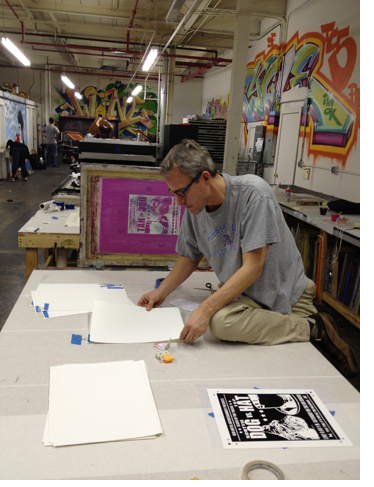
With your screens prepared, you can print each color, one at a time, onto your surface. I always print from lightest color to darkest, with black being last, which covers over any colors beneath it. It goes like this:
Lay down your shirt or paper in a way so it doesn’t wiggle around. It’s got to stay put, right in the same spot. You can use sticky spray or tape to hold it in place. Prepare your screen for the lightest color by gently putting a little ink on top of the screen, the side facing away from the printing surface. Place the screen right on top of the shirt or paper (clean side down), lined it up properly. There are several ways to do this, but we’ll stick to printing basics right now.
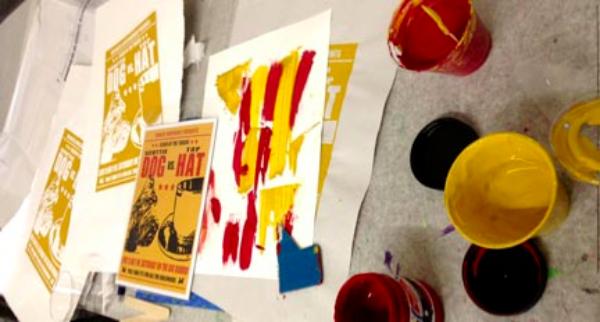
Print your first color by pushing the ink through the screen with a stiff squeegee, kind of like the kind you’d use to get cleanser off a window, but stiffer. You can pull this across the screen by hand or using a machine. Line up the next screen with the next lightest color so that it’s properly positioned and repeat. Then dry. With T-shirts, you can dry them in the sun, or if you’re running a larger operation, in an oven on a conveyer belt, kind of like Domino’s uses to cook their mass-produced pizzas. When you’re printing on paper, you can air-dry your prints on a rack.
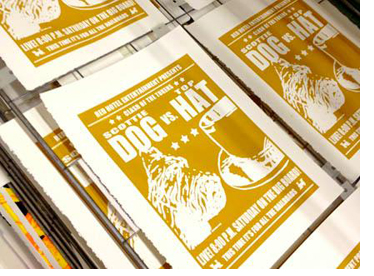
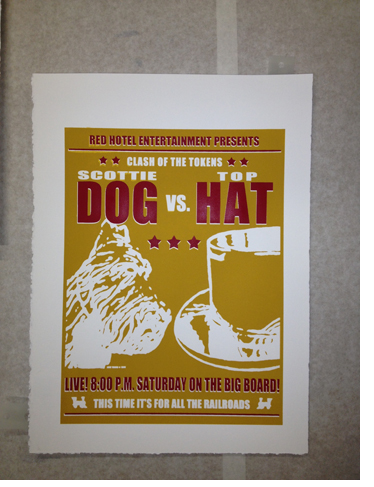
Print black last and voilà! You’re done. Silk-screen printing, just like that. This was the first screen printed poster I made in New York, and you can buy it here.
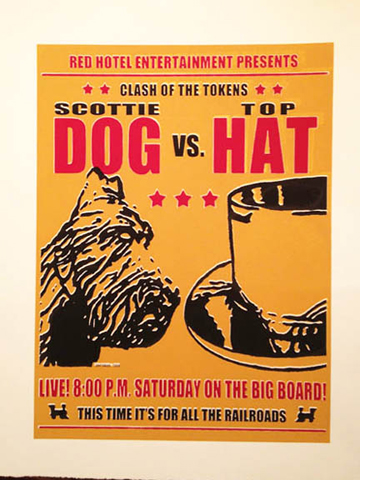
Silk-screen printing is the process I used to make the original series of bar prints for my Great Good Places artwork. You can check out my newest prints here, including prints of New York’s favorite neighborhood bars that’ll appear in my book Great Good Places of New York, to be published by Rizzoli in 2018.
I realize how goddam complicated and esoteric this process sounds. It’s so hard to explain verbally. I hope the pictures and links help. It took me going through it myself before I could grasp it — doing is almost always a better way to learn than reading, at least for me. Grasp it I finally did, and you would too, if you worked a day at a screen printing shop.* Also, I’ve included a video below, that briefly takes you through the process.
*Places to take Silk-Screen Printing Classes:
New York: Gowanus Print Lab, Polluted Eyeball
Ann Arbor/Detroit: Ocelot Print Shop, Washtenaw Community College
San Francisco: Workshop
And here’s a short video that walks you through the silk-screen printing process:

13 comments
I just want to mention I am just newbie to blogging and site-building and really savored your blog. Most likely I’m planning to bookmark your blog . You amazingly have beneficial posts. Many thanks for revealing your web-site.
Youre so cool! I dont suppose Ive read anything like this before. So nice to find any person with some authentic thoughts on this subject. realy thanks for beginning this up. this website is one thing that is wanted on the web, someone with a bit originality. helpful job for bringing one thing new to the internet!
Nice tips and extremely true. Probably the most essential things web owners, or almost any enterprise, is capable of doing is you should never surrender. Even when circumstances are powerful it is essential to be there to your website visitors and prospects since they will be planning to try to remember you in a very confident light as soon as things become much higher and you can be rewarded to your works.
I have been reading out a few of your stories and i can claim pretty good stuff. I will definitely bookmark your blog.
Wow! This can be one particular of the most beneficial blogs We’ve ever arrive across on this subject. Actually Fantastic. I am also a specialist in this topic therefore I can understand your hard work.
Very interesting information!Perfect just what I was searching for! “The most wasted day of all is that on which we have not laughed.” by Sbastien-Roch Nicolas de Chamfort.
As I site possessor I believe the content material here is rattling magnificent , appreciate it for your efforts. You should keep it up forever! Best of luck.
I went over this site and I conceive you have a lot of great information, bookmarked (:.
Thanks for the sensible critique. Me & my neighbor were just preparing to do a little research on this. We got a grab a book from our local library but I think I learned more from this post. I am very glad to see such great info being shared freely out there.
Unquestionably believe that which you stated. Your favorite justification appeared to be on the web the simplest thing to be aware of. I say to you, I certainly get irked while people think about worries that they just do not know about. You managed to hit the nail upon the top as well as defined out the whole thing without having side-effects , people could take a signal. Will likely be back to get more. Thanks
You have noted very interesting points ! ps nice web site . “Where can I find a man governed by reason instead of habits and urges” by Kahlil Gibran.
Great write-up, I’m normal visitor of one’s site, maintain up the nice operate, and It is going to be a regular visitor for a long time.
A great post without any doubt.